Inhoudsopgave
Startpakket Bill Of Materials
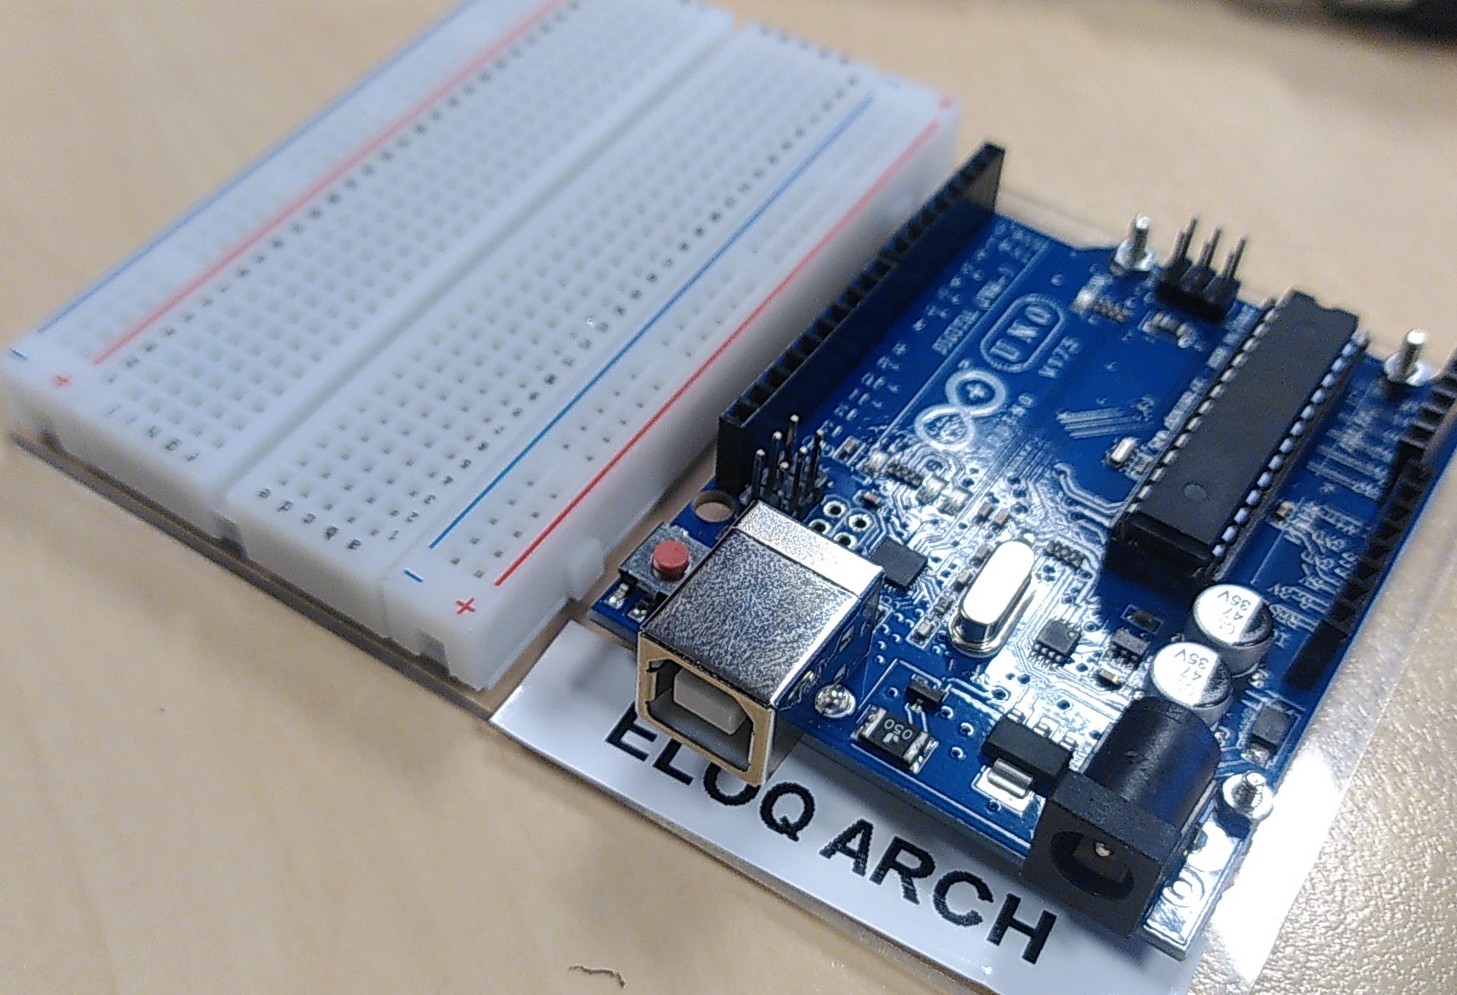
- 1 platform
- 1 breadboard klein
- 1 Arduino Uno Rev 3
- 1 USB Kabel
Binnengekomen parts
- potmeters 10 kOhm – 1 kanaal – liniair – 15mm + zwart-oranje knoppen bij Tinytronics
- ESP-Link ESP8266 Programmer CH340C van Tinytronics
- ultrasone sensors HC-SR04
- wires male-male
Leren van fouten bij het monteren
- Het platform is een mooie transparante acrylplaat. De lelijke bruine stickers folies aan beide kanten haal je er af. Met je nagel bij een hoekje op de korte kant, 50x friemelen tot je een begin hebt. Zachtjes, langzaam. Opzij, eerst de korte kant. Als de korte kant los genoeg is, naar de lange kant. Hij kan in 1x los
- Kijk hoe de Arduino op het platform moet. Als je het platform ondersteboven hebt, steekt je Arduino aan de zijkant uit en passen de andere schroeven niet.
- Plak nu eerst je naamsticker onder de USB-B poort. Onder de Arduino friemelen hoeft dan niet.
- De Arduino monteer je op het bord met de metalen 4 boutjes/moertjes. Omhoog met de punten. Het tool past net niet perfect maar goed genoeg
- Het breadboard gaat met een sticker op het platform. 1 poging.
Lees
- Arduino SIK Guide van Sparkfun
- Hierbij hoort deze code: https://lesmateriaal.voeten.com/wp-content/uploads/2026/01/SIK-Guide-Code-V_3.3b.zip
- Bij elk voorbeeld is een INO bestand met code en een H bestand met Help text.
- Basic Arduino Opstelling
Online Editor
- Cloud Editor for Chromebook
- Ardunio Cloud Editor Junior (< 18 jaar)
- Boomer Arduino Cloud Editor ( => 18 jaar)
Weerstanden? Welke is welke
- 10 kOhm bij kiwi. –> tinytronics
- Weerstand Calculator
Opdracht 1 Blinking a LED
Pagina 21 van
- https://lesmateriaal.voeten.com/wp-content/uploads/2025/12/sparkfun-arduinoSFE03-0012-SIK.Guide-300dpi-01.pdf
- of
- Blink | Arduino Documentation (met code)
Bill of Materials
- 1x weerstand 330 Ohm
- 1x setje wires. 3 x wire male – male
- 1x LED Yellow
De code staat in de cloud editor, examples, blinking led
Opdracht 2
PAS OP : Je Potmeter Past Niet zoals het zou moeten.
De leerlingen van Eloq Arch
Dus alle wires komen ook anders dan in de SIK guide.
Anders krijg je brandgeur.
Ontwerp
- Pagina 27 van
- https://lesmateriaal.voeten.com/wp-content/uploads/2025/12/sparkfun-arduinoSFE03-0012-SIK.Guide-300dpi-01.pdf
- Analog Input | Arduino Documentation – voor Analog Read = potentiometer
- Voorbeeld code, bijna goed, van https://www.build-electronic-circuits.com/arduino-potentiometer/
- En meer voorbeelden van https://arduinogetstarted.com/tutorials/arduino-potentiometer#google_vignette
Bill of Materials
- 1x potentiometer 10kOhm + knop van Tinytronics
- 3 lange wires extra
- 1x led, 1x 330 ohm weerstand
Opdracht 3 RGB LED
p31 van de SIK gide
BOM
- RGB Led
Tinkercad Circuit Designer
Maak ook hier een account bijv met je prive google account.